#
Loads
#
Overview
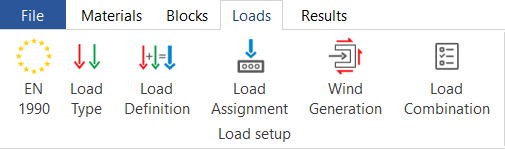
OPTUM Concrete Solution uses a logical, straight-forward way of defining and applying loads to models. The "Loads" ribbon takes you through the necessary fields. Here, we have applied a hierarchical structure. The most general information is defined first and as you progress along the ribbon, more specific information is defined.
#
Codes
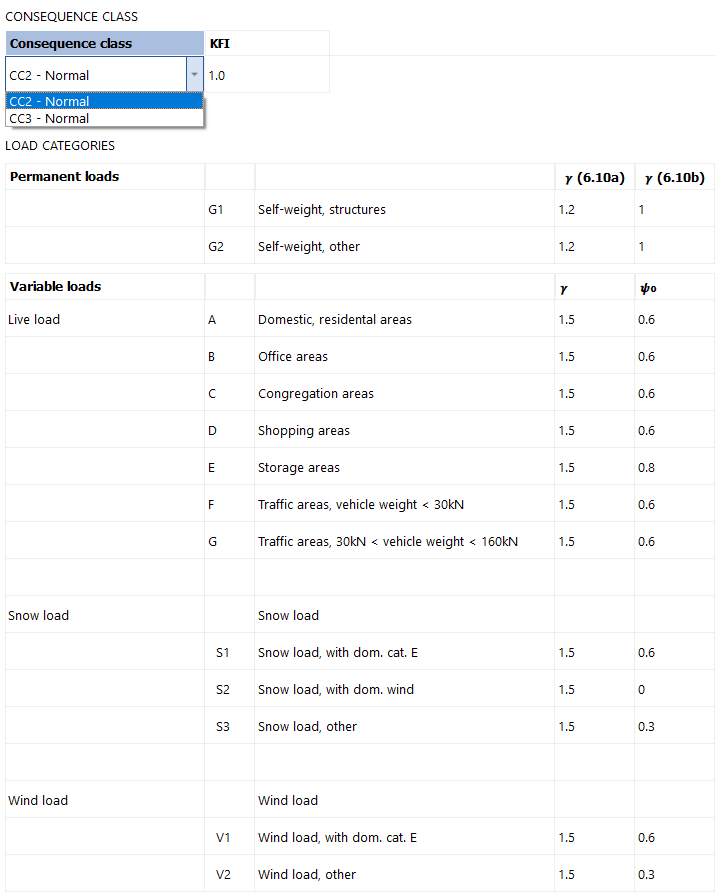
The first tab on the ribbon is the Codes. This tab contains all the relevant information from the standards (Eurocode 2 at the moment). In this tab, the relevant partial factors for the various load categories are given, and the consequence class of the structure is defined. The application then uses these values when applying e.g. snow load. All of these values are global, i.e. they apply for all loads for the entire model.
#
Vertical loads
#
Load types
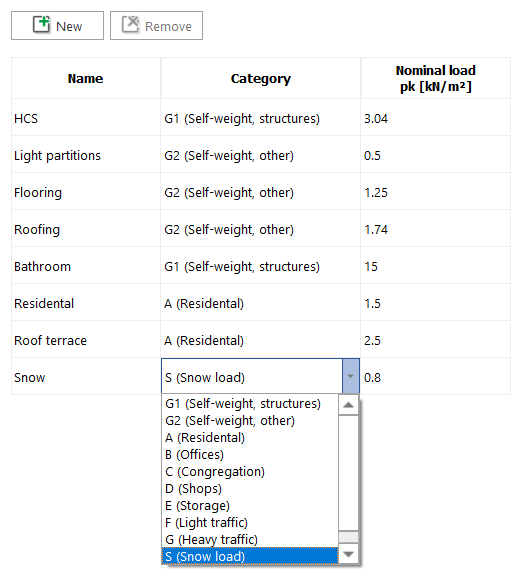
In this tab, the basic load types are defined. Load types are simply the surface loads, i.e. in kN/m2, from the various permanent and variable loads:
#
Load definitions
Having defined the Load Types, we now move on to the Load Definition tab. In this tab, the Load Types are combined to form Load Definitions. In our case, we define three Load Definitions, "Apartments", "Stairs" and "Roof". This is simply done by selecting which Load Types are included in the definition:
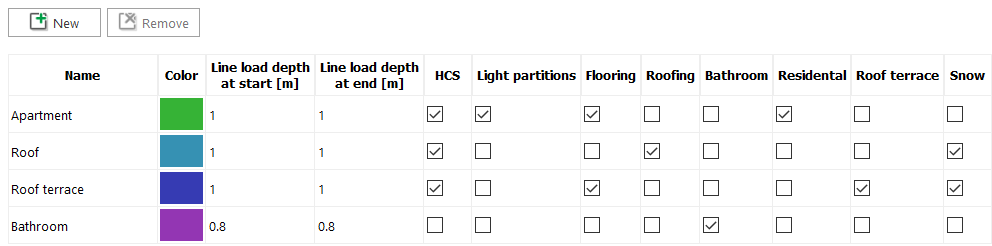
The latter definition is applied as a line load on the relevant shear walls.
#
Load assignment
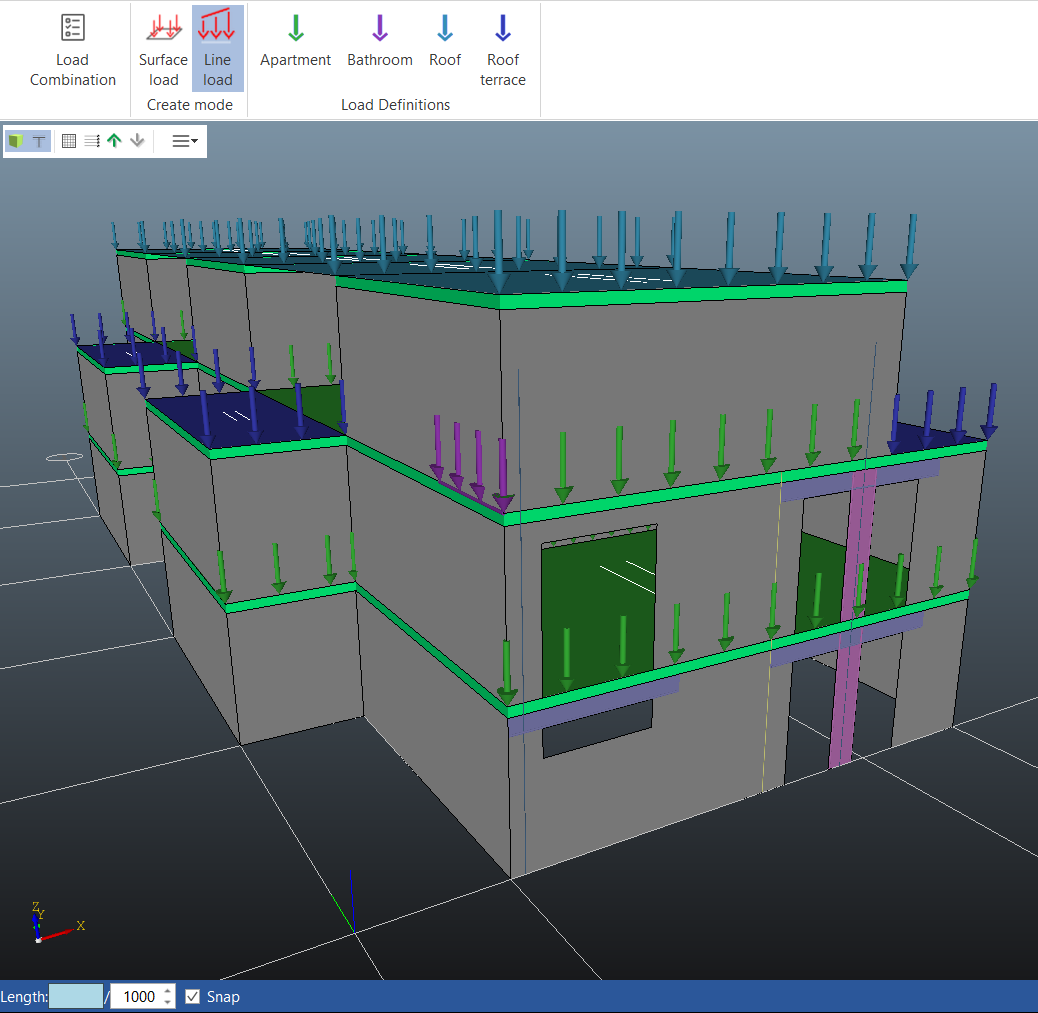
The next step is to apply the Load Definition as either surface loads on the decks or line loads directly on the walls. For the surface load, the span direction of the decks indicate how the surface load is distributed on the supporting walls. In the ribbon, there is an overview of the Load Definitions:
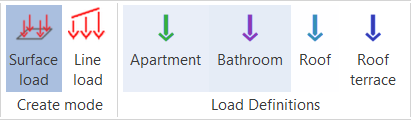
When assigning a Load Definition, click either the "Surface load" or "Line load" button. The surface load can then be applied by selecting a Load Definition and then selecting decks, or the other way around, i.e. selecting decks and then choosing a load combination. The line loads are applied by selecting "Line load" and then a Load Definition. The loads are then drawn unto the walls. When applying line loads, the snapping features can be used to make it easier and more precise.
#
Wind loads
#
Wind generation
OPTUM CS is capable of generating the relevant wind loads acting on the model. The application follows the procedure of the well-known Excel spread sheet developed by the Danish Precast Association (BEF). Unlike the spread sheet, however, the user does not need to define the geometry in a table. Instead, the geometry is pulled directly from the model making the calculation of the wind loads extremely easy and efficient:
- The shear walls are grouped automatically.
- If two walls are defined next to each other, they are treated as one wall group in regards to the distribution of horizontal forces.
- The contour of each storey is established automatically.
- At the moment, a simple bounding box is used based on the positions of the walls. In most cases, this provides a decent approximation to the wind load on the structure.
- The user gives a few input parameters, e.g. the characteristic wind pressure and shape factors:
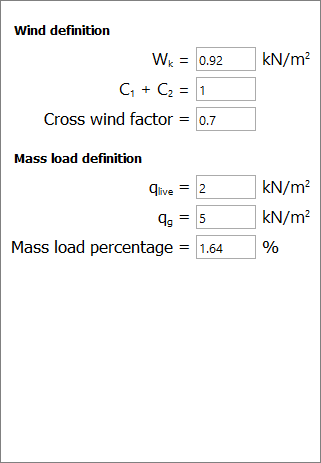
- Based on these inputs, the horizontal force on each level is calculated and distributed to the walls. This is done for a total of 16 combinations of horizontal loads:
- 4 cases of seismic load
- 12 cases of wind load - combined using the "Cross wind factor"
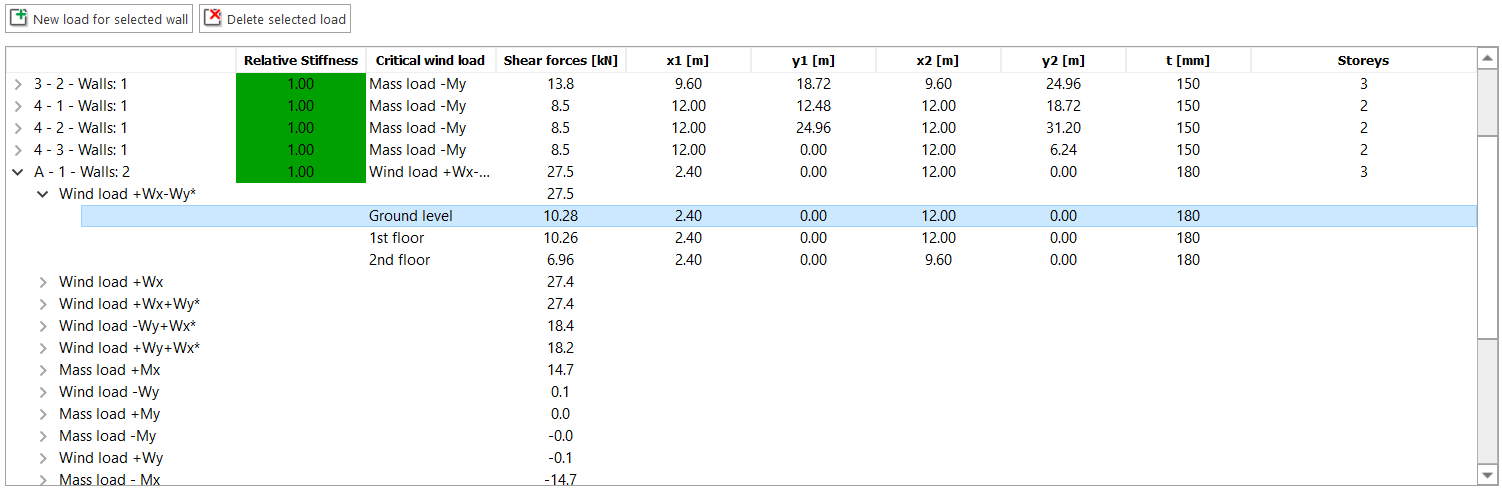
- The forces on the shear walls are calculated automatically and updated every time something is changed in the model. A table highlights the critical wind load for each wall group, but it can be expanded to dive into the exact distribution:
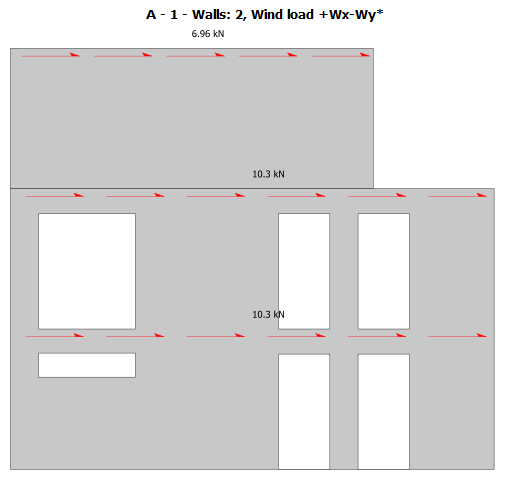
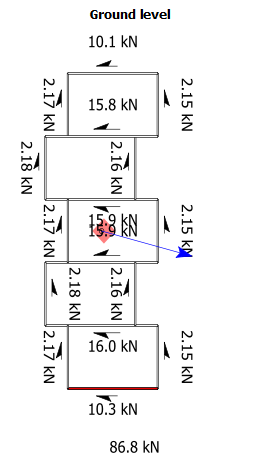
- The forces seen in the table are also displayed in two dynamic figures above the table. Selecting different wall groups and levels will update the figures:
If the automatically generated loads are not sufficient or if the model only contains a single wall, user-defined wind loads can be added. This is done by selecting the relevant wall group and clicking the "New load for selected wall" button:
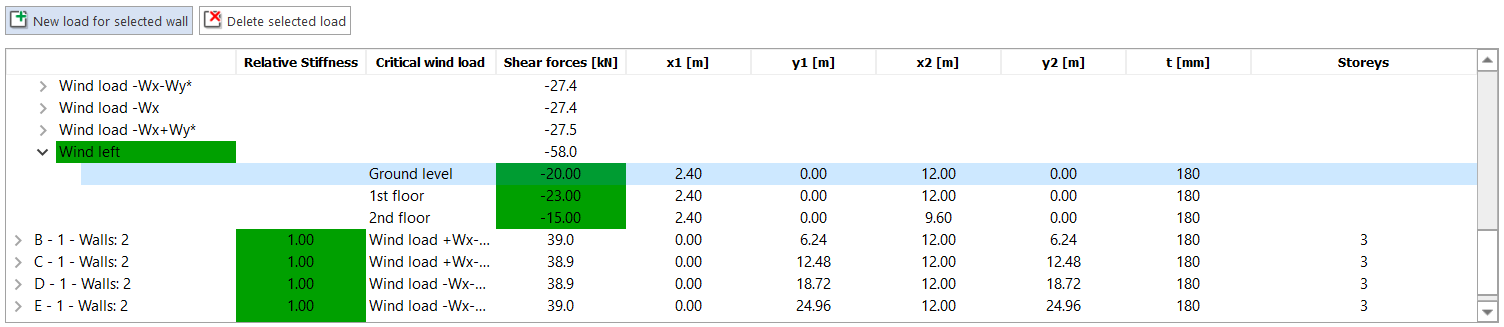
That will add a new row to the table for that wall. The name of the new wind load can be changed, and for each storey a horizontal force can be specified.
#
Load combinations
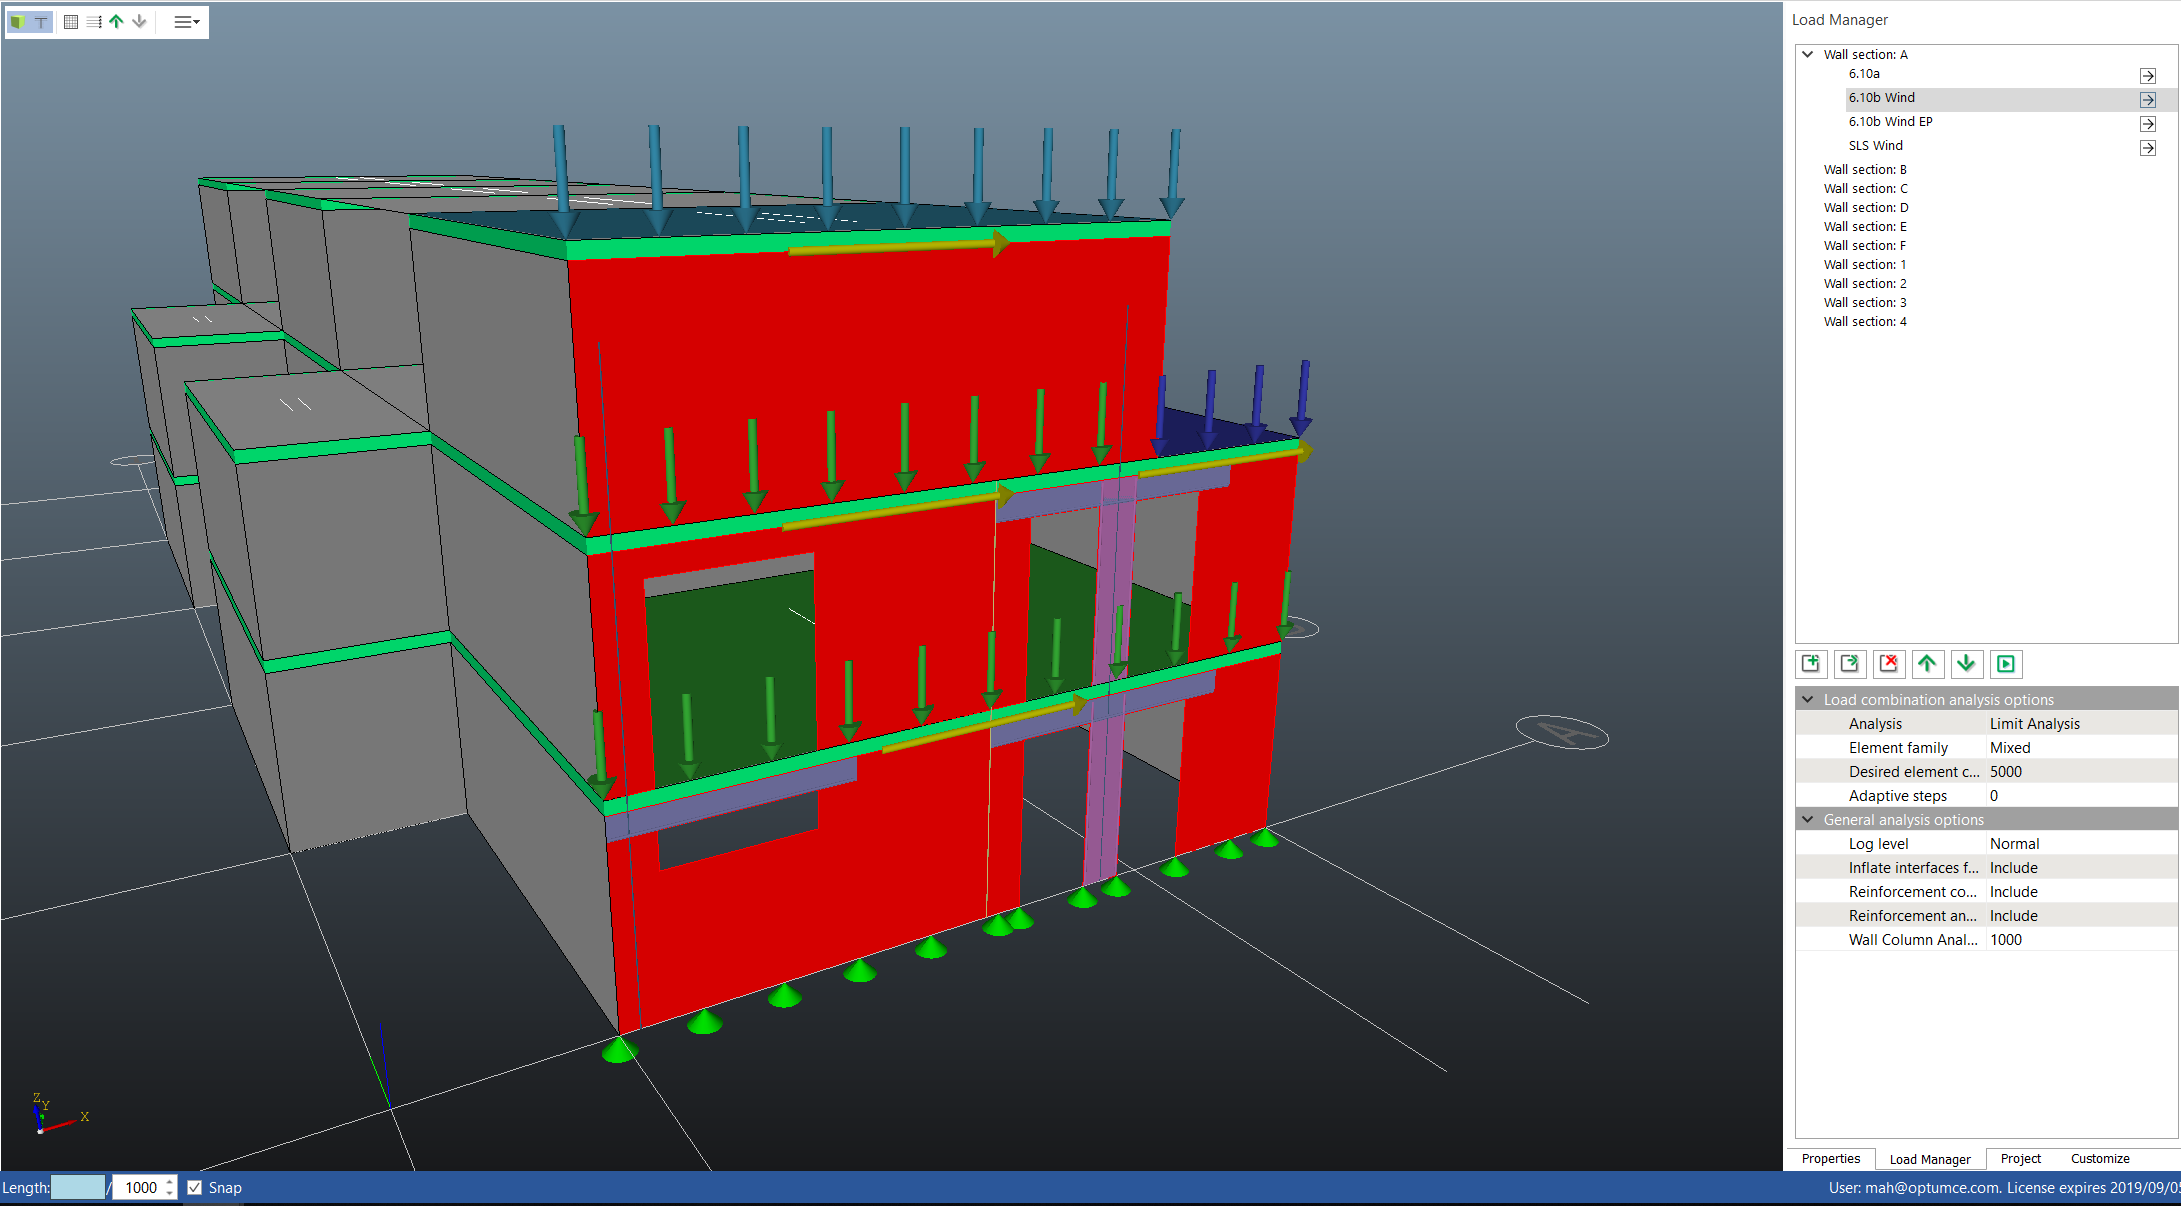
A single model in OPTUM CS may contain multiple walls. It is therefore possible to create multiple load combinations as well. This is done by going to the Load Manager tab. In the Load Manager, the wall sections are listed, and a new load combination can be added by simply clicking the [+] button below:
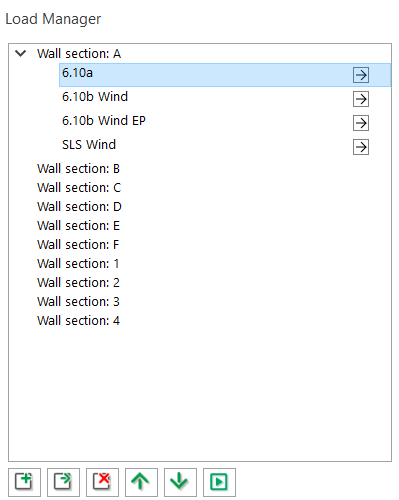
In our case, we have created four load combinations for Wall Section A and updated the names of the load combinations to reflect the selected loading and analysis type (EP for Elastoplastic analysis). The arrow in the box indicates that a load combination is included when the run button (play button) is pressed. Simply click the arrow to remove it and thereby skip the load combination when running. When editing a load combination, the relevant walls are highlighted on the canvas and the applied loads is shown as arrows indicating their direction of action:
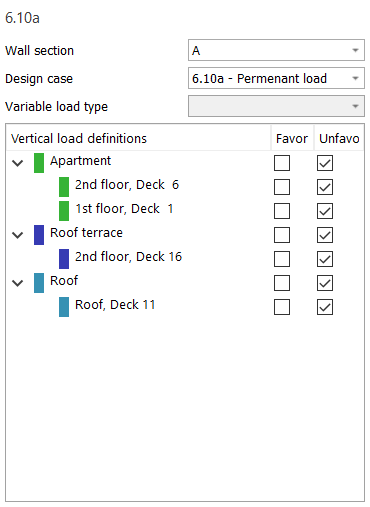
Three design cases are available: Two for the ultimate limit state, 6.10a (permanent load) and 6.10b (variable load), and one for the serviceability limit state (SLS). For each load combination, there is a list of all Load Assignments, i.e. the vertical load definitions applied to decks and as line loads. For each Load Assignment, you can select whether the assignment is favorable, unfavorable or nor relevant at all for this wall. This is simply done by ticking the boxes in the two columns. Each Load Assignment can be highlighted by selecting it. This will show the location of the load on the model. The final step in creating a load combination is to select the horizontal load. As previously discussed, the horizontal loads are calculated for a total of 16 different cases, including seismic action. For each load combination, a list of the 16 horizontal loads are shown, and the sum of the forces is listed for each as well. Any user-defined wind loads are shown separately in the list:

This makes it easy to pick the critical case for each shear wall. In order to apply the horizontal loading, simply tick one of the boxes on the list. Usually, only the maximum load (in terms of absolute values) is relevant to analyse.